How to setup your comments
# Generate Private Access Token
Head to Github and on Settings -> Developer Settings -> Personale Access Tokens and click Generate New Token.
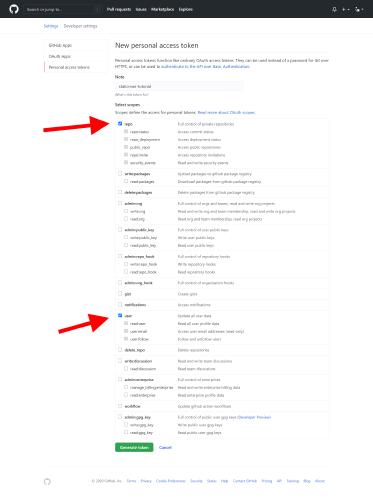
Write a placeholder name and select the repo and user subsections. Then press Generate token.
# Deploy on Heroku
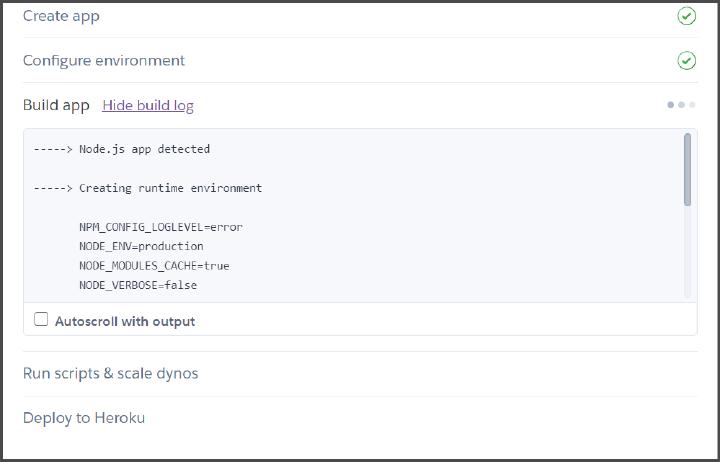
Head over to the GitHub project page and click the purple button (or in alternative click here).
You will land on a page where a name for your project is asked. Type whatever name you would like and confirm.
At the end of the setup you can continue on Manage App.
# Generate Private Key
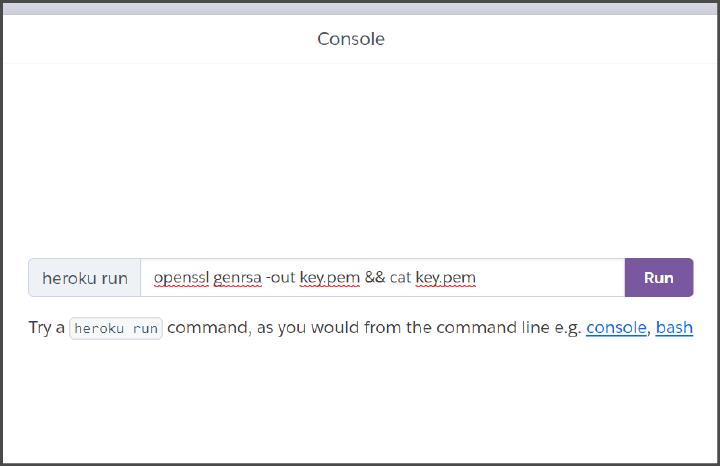
From the toolbar click More -> Run Console and type openssl genrsa -out key.pem && cat key.pem and then press Save Session. 1
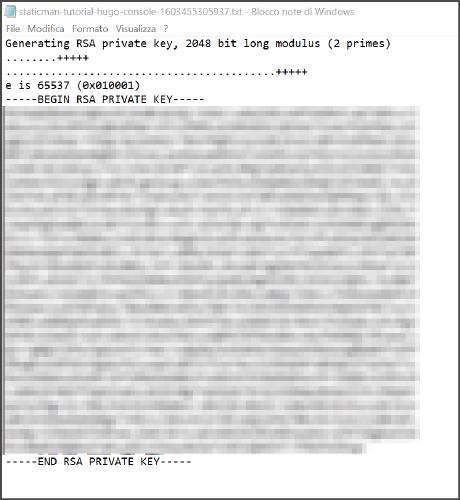
A .txt file is going to be downloaded.
Open it and copy the section made by:
-----BEGIN RSA PRIVATE KEY-----
(a long alphanumerical text)
-----END RSA PRIVATE KEY-----
You will need it later.
# Configure the environment variables
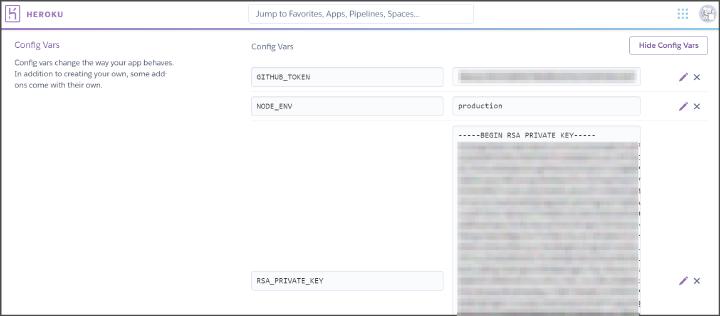
Go to Settings -> Config Vars and type the following fields:
NODE_ENV = production
GITHUB_TOKEN = (Private Access Token from before)
RSA_PRIVATE_KEY = (Private Key from before)
# Check if it works
Open a webpage and type <name-of-your-heroku-istance>.herokuapp.com in the urlbar. Open it and a page with Hello from Staticman version 3.0.0! will be shown.
Now to enable to register your comment open a webpage and type
<name-of-your-heroku-istance>.herokuapp.com/v2/connect/<github_username>/<github_repo>/main/comments
A confirmation will appear for only the first time.
# Configure Hugo
Open your repository with all your Hugo/Pyxill2 files and edit your config.toml file.
In the [params] section comment out (delete the hash character) the staticman_api variable and change the value to:
https://<name-of-your-heroku-istance>.herokuapp.com/v2/entry/<github_username>/<github_repo>/main/comments
Save.
# How to manage comments
Comments are saved in folders based on the various blog posts. You can delete or edit theme in the /data/comments/ folder of your Hugo config. Unfortunately you need the placeholder folder to avoid breaking the website.
# Avatar provider
You can choose between Gravatar (faster, more widespread) or Libravatar (more privacy friendly), just set params.avatar to gravatar, libravatar or avatar if you want to use a static image (place it as avatar.png under the static directory, better if it’s 100x100).
-
Yes, you can use your PC if you have the software already installed if you like, but this is more easy for a general pourpose tutorial 😊. ↩︎


Comments
Nothing yet.
Say something